It’s almost Halloween and a perfect time to make Homemade Pumpkin Puree Recipes from your Jack-O-Lantern leftovers.
Don’t throw out the guts of the pumpkin! Make delicious homemade puree for your next healthy pumpkin pie spice smoothie.
If you don’t know how to, stick with me and we’ll figure it out together!

Homemade Pumpkin Puree Recipes
Don’t waste your Jack-O-Lantern leftovers when there are plenty of homemade pumpkin puree recipes available. Pumpkin puree can be used in pumpkin pies, bread, and soups.
The abundance of Vitamin A, zinc, and Vitamin C found in pumpkin is the perfect mix for using as a face mask.
To make it sound even better, pumpkin is a very healthy vegetable!
Did you know, in just 1 cup of pumpkin there is as much as 200% of the recommended Vitamin A?
Vitamin A is a powerful antioxidant that has many roles. It important for:
- Healthy eyesight
- Skin health
- Anti-inflammatory
- Boosting neurological function
- Bone health
Other healthy facts about pumpkin:
- High in fiber
- High in protein
- A good source for omega-3 fatty acids
- Aid in weight loss
- Member of the squash family
Pumpkin seeds also have a lot of health benefits:
- Improve heart health
- Help regulate the immune system
- Support individuals who struggle from iron deficiency
- Anti-inflammatory
- Improve the quality of sleep
- Decrease postmenopausal symptoms

How to Get Started
If you’re lucky enough to have a pumpkin patch nearby, go pick you out the prettiest pumpkin you can find!
If there’s no pumpkin patch, I’m sure you can find pumpkins in your local supermarket or produce stand.
Step 1:
Try to find a pretty pumpkin with a unique shape and an unbroken stem.
Step 2:
Find a well-lit area in the kitchen or outdoors and have a pumpkin carving set, cutting board, and a bowl ready.
Step 3:
Carefully cut the top part off with the blade pointed downward and slightly angling it inward, making a nice, easy to use the lid.


Step 4:
Using an ice cream scoop, remove the pumpkin guts and seeds and put in a bowl for later use.

Step 5:
Separate the pumpkin pulp from the seeds. Wash the seeds and lay them out on a pan with paper towels, allowing the seeds to dry.

Step 6:
Move the separated pumpkin pulp and seeds to another area for later use.
Step 7:
Prepare to carve your Jack-O-Lantern. Proceed to the next section.

Beginners – Start by using an Easy Stencil
Step 8:
If you are a beginner like myself, you will want to search for free printable stencils, easier to carve than some advanced ones.
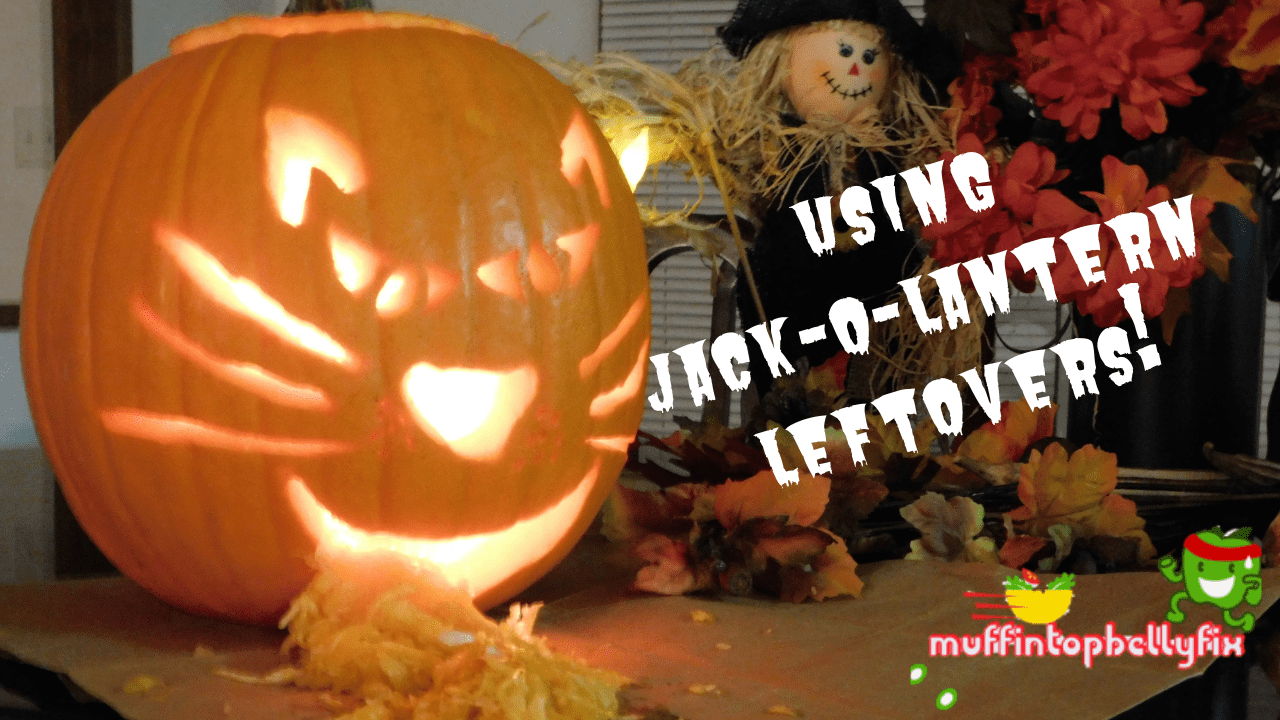
The stencil I chose was a cat’s face. When I printed it, I realized the size of the drawing was larger than my pumpkin. It needed to be sized down, but it was a PDF file and wasn’t very user-friendly.
I ended up having to open the document and using the snipping tool to cut it out, then pasted it into a word document. Follow the steps below, if you need to resize your stencil;
- Open the PDF file/image
- Using the snipping tool, drag the cursor over the image until all of it is captured.
- Save it
- Open a blank Word document, and click on “Insert” and then “picture”. Locate the picture you just saved and click on it, then click on “Insert”.
- Select the image on the Word document and using the sizing dots on the corner of the image, make the image smaller. Then re-save it and click on Print Preview to see what it will look like when printed.
- Print and trim image down, preparing it for your carving project.
Step 9:
After trimming down your stencil, tape it to the surface of the pumpkin where you want to carve it.
Step 10:
Using the plastic pointed tip tool from the carving kit, trace the stencil by poking small holes around the image. (This was a little challenging for me. Some people may find it easier to draw the image on the pumpkin and then carve it)
Step 11:
Clean out extra pieces and strings from the inside of the Jack-O-Lantern and wipe down the surface of the pumpkin.
Step 12:
Make a flat surface inside of the pumpkin for a candle to sit. I used 3 tea lights.


How to Make Homemade Pumpkin Puree
Making homemade pumpkin puree is quite simple.
If you are planning to display your Jack-O-Lantern for more than 24 hours, you’ll have less pumpkin to use for puree, but enough for a great pumpkin pie spice shake!
Directions:
Using an ice cream scoop, scrape the inside of the pumpkin until it starts to turn white. You only want to use the orange part.
If using the entire pumpkin for puree, cut the pumpkin in half from top to bottom. Cut into smaller sections and trim off the rind (this step can be done after it is cooked if easier).
Trim all the pieces from the carvings, to remove the rind and cut into small pieces. Place the pieces on a cookie sheet.
Preheat the oven to 250 degrees.
Bake the pumpkin pieces for 45 minutes.
After the pumpkin is tender, remove from the oven and allow cooling. (If the rind is still attached at this point, it should come off easily now.)
Using a food processor or blender, blend until thoroughly mashed.
It can be used immediately for smoothies, soups, or bread.
If storing it: Put it in a freezer bag and place it in the freezer.

Easy Pumpkin Pie Shake with Whey Protein
Ingredients:
- 10 oz Unsweetened Almond Milk
- 1 scoop Vanilla Ice Cream Whey Protein
- 1/2 cup Pumpkin Puree
- 1 tsp Pumpkin Spice
- 1/4 tsp Cinnamon
- 1/4 tsp Nutmeg
- 1 tsp Vanilla Flavoring Extract (optional; 12 cal)
- 2 tbsp Extra Creamy Whipped topping (optional)
- Ice
To Prepare:
Add all the ingredients to a blender except the whipped topping and blend until creamy and thick.
To make this shake thicker, add more ice.
Add 2 tablespoons of Extra Creamy Whipped topping to the top and sprinkle with nutmeg.
Drink and enjoy!

Delicious Roasted Pumpkin Seeds with a Kick!
Ingredients:
- 4 cup uncooked pumpkin seeds, rinsed and dried
- 1 tablespoon extra-virgin olive oil
- 1/2 teaspoon salt (kosher)
- 1/4 teaspoon black pepper
- 1 teaspoon chili powder
- 1 teaspoon garlic powder
- 1 teaspoon cayenne pepper
To Prepare:
- Preheat oven to 350 degrees.
- Using parchment paper, line cookie sheet.
- In a medium bowl, add the prepared pumpkin seeds, oil, and seasonings.
- Using your hands, mix until well blended.
- Spread the seasoned pumpkin seeds out on the parchment paper.
- Roast for about 10 minutes, then stir them around and continue to roast until they are golden brown.
- These are best eaten when hot and fresh but can be stored in a sealed container for a few days.

Authors Note
I hope you enjoyed this post and found something of interest. As you can probably tell, I love cooking! Sometimes I feel like I spend more time in my kitchen than I should, but I love learning new recipes and sharing them with you.
In this article, you got to see me make my first attempts at carving a Jack-O-Lantern, making homemade pumpkin puree recipes, including roasted pumpkin seeds.
Maybe some of it was helpful! 🙂
I enjoyed doing it!
Please leave me feedback in the comment section.
Do you have any pictures from Jack-O-Lanterns that you have carved?
I would love to see them! I’m sure they are better than mine. 🙂
5
Hi Devara, thanks for sharing these great ideas and recipes. I enjoyed reading your blog! Before i bumped into this, all i knew was pumpkin soup lol! Now that i got a kid, i figured i should get creative with nutritional foods for him to enjoy eating them and i am glad i got here. After the halloween shenanigans, nothing will go to waste again 😉
Hello Janet,
You are welcome! I’m glad you found something of interest here. This was actually my first time making homemade pumpkin puree recipes from my leftovers. I didn’t expect it to turn out as good as it did!
Most people use sugar pumpkins when making homemade puree, but they are more expensive and I didn’t want to waste the pumpkin that I already had.
Please explore my site for more healthy tips. I’m sure you will find more healthy recipes to try. I love to cook!
Do you like seafood?
This is one of my favorite dinner recipes! “Oven-Baked Salmon Foil Pack with Shrimp”
I look forward to hearing back from you soon.
Best of health,
Devara